
Taking on this bathroom was nothing short of monumental. After laying nearly 960 square feet of antique limestone flooring throughout the main living area, this space quickly became the next major challenge in the pool house project.
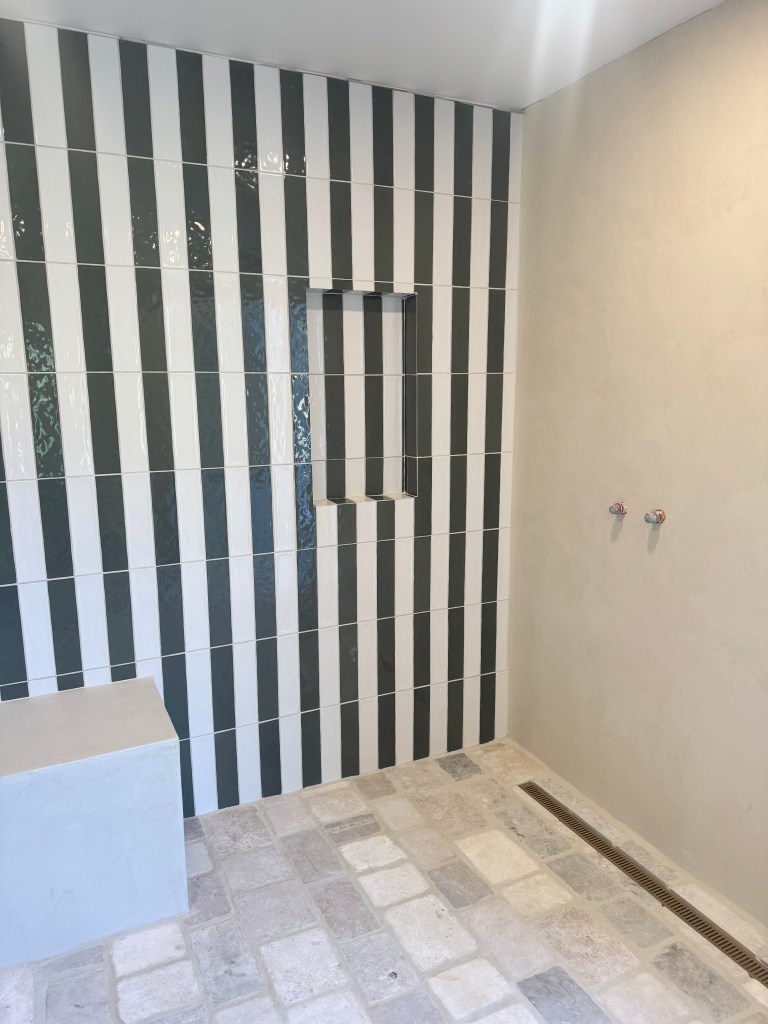
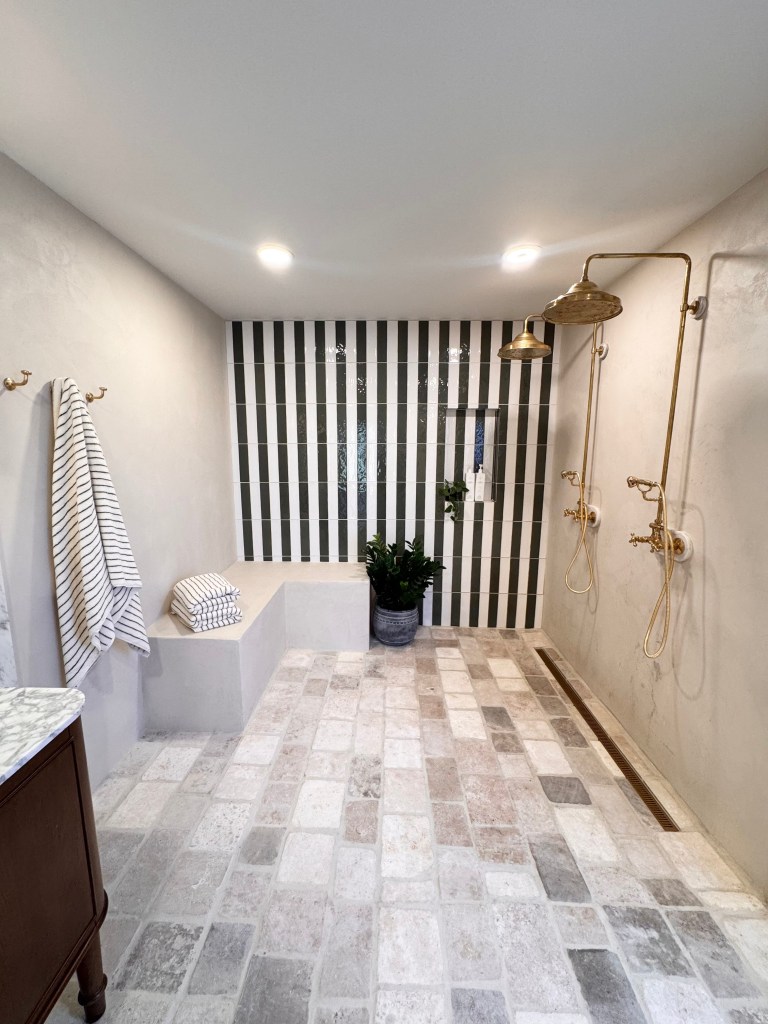
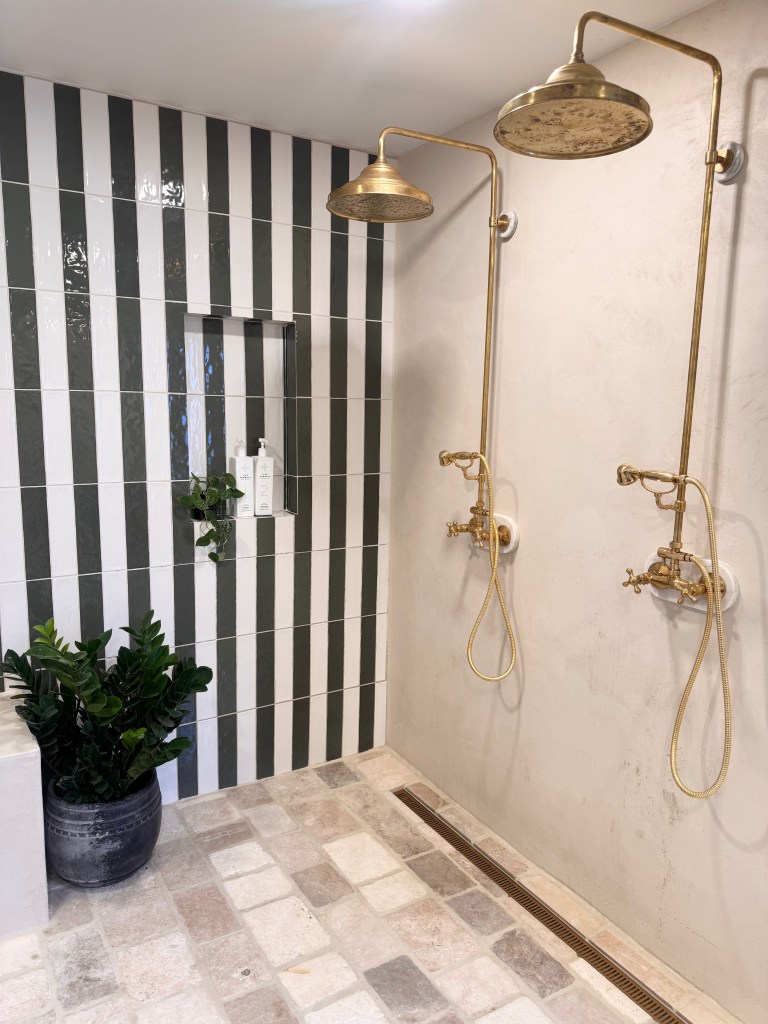
The shower alone is massive—8′ x 8′ x 9’—and, truthfully, it was my biggest design misstep early on. In hindsight, the scale felt excessive, and for a while, I regretted how much of the footprint it occupied.
But as with most projects, the design evolved. Over the months leading up to construction, I kept tweaking the vision. Finally, with the help of a good friend (and a lot of brainstorming), I landed on a design that I became completely obsessed with—and suddenly, I didn’t regret that oversized shower at all!
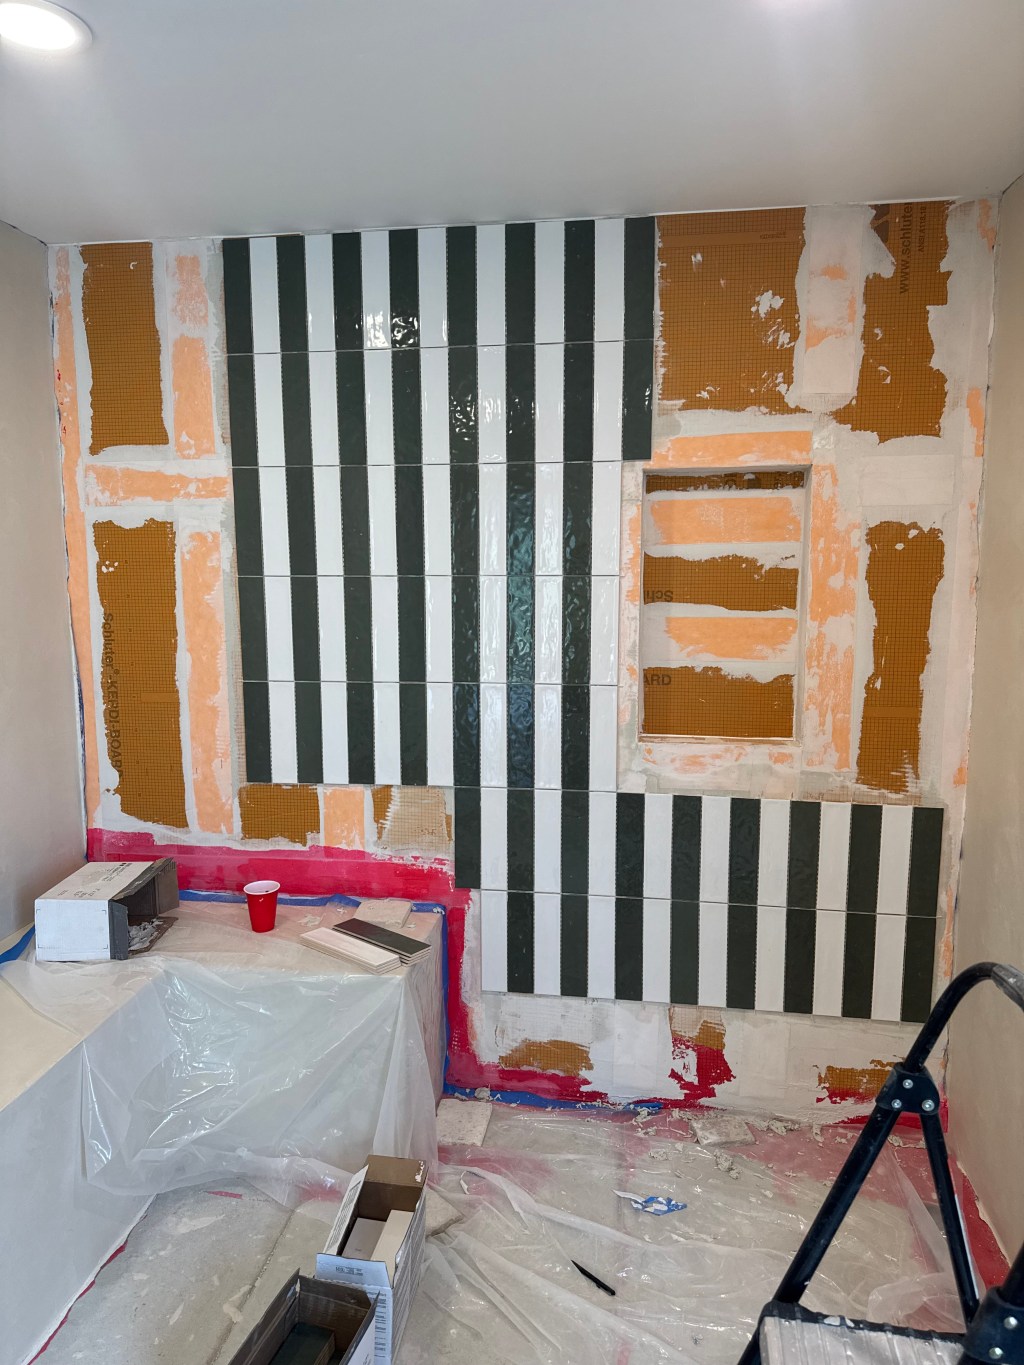
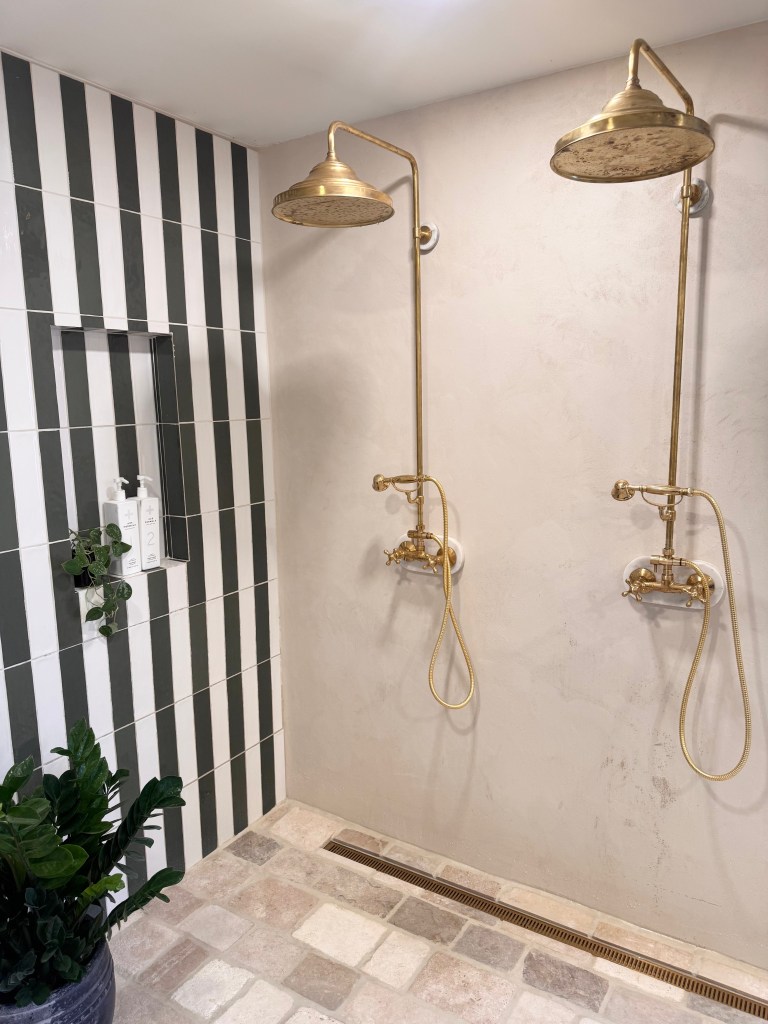
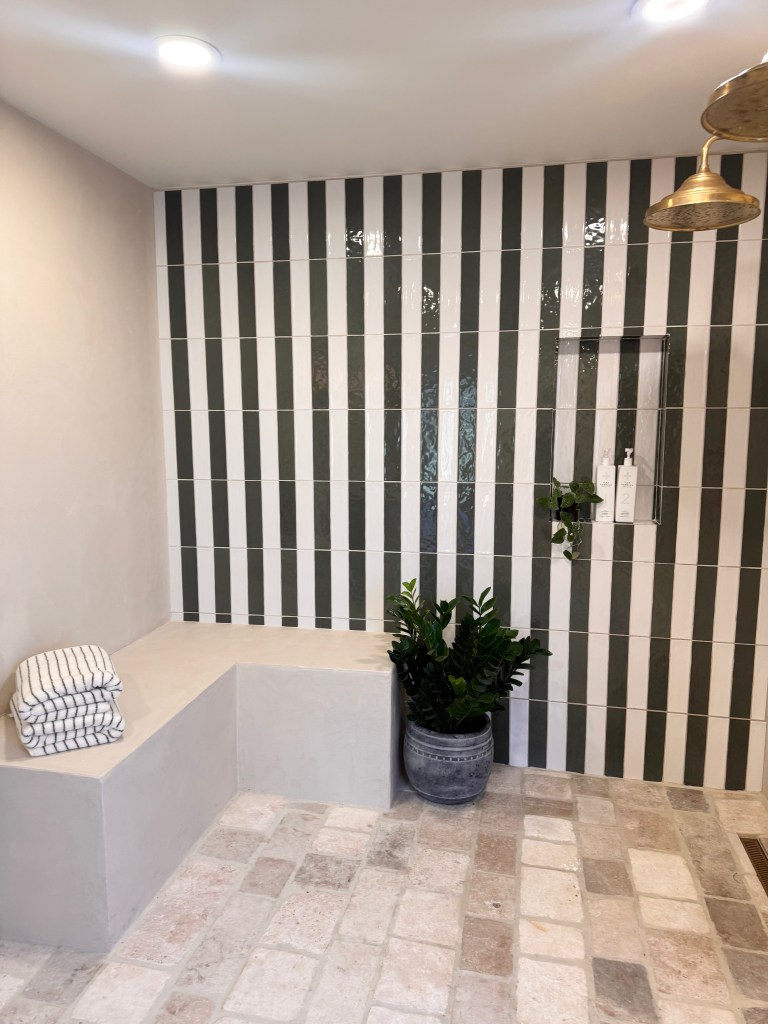
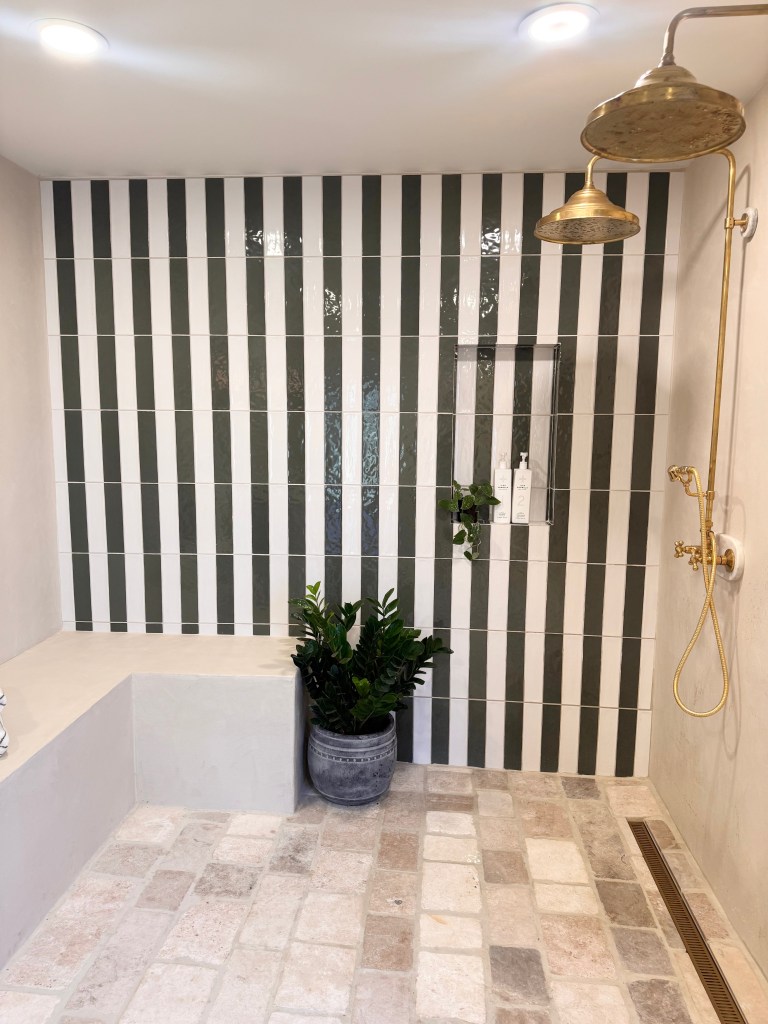
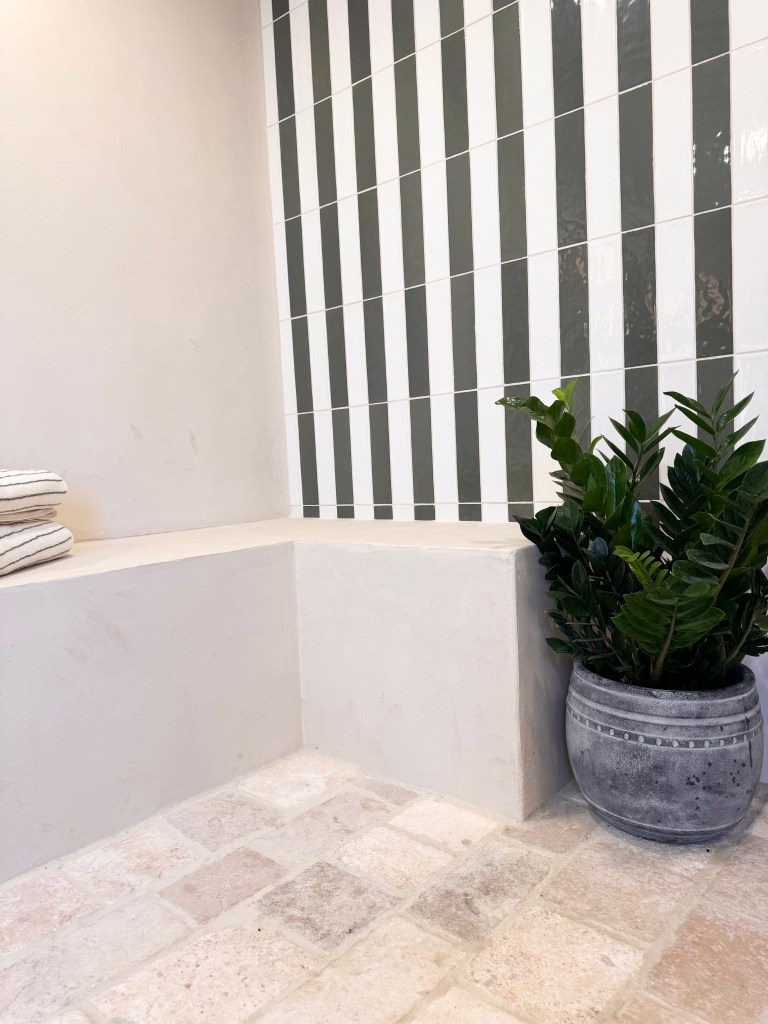
For the walls, we chose Meoded’s Concretta, a specialty plaster that brings a rich, tactile finish to the space—modern but timeless. To create a focal point, I selected a striking green and white cabana-striped zellige porcelain tile for the main back wall of the shower. It instantly brought personality, depth, and just the right amount of drama.
What started as a design flaw ultimately became one of my favorite features of the entire pool house.
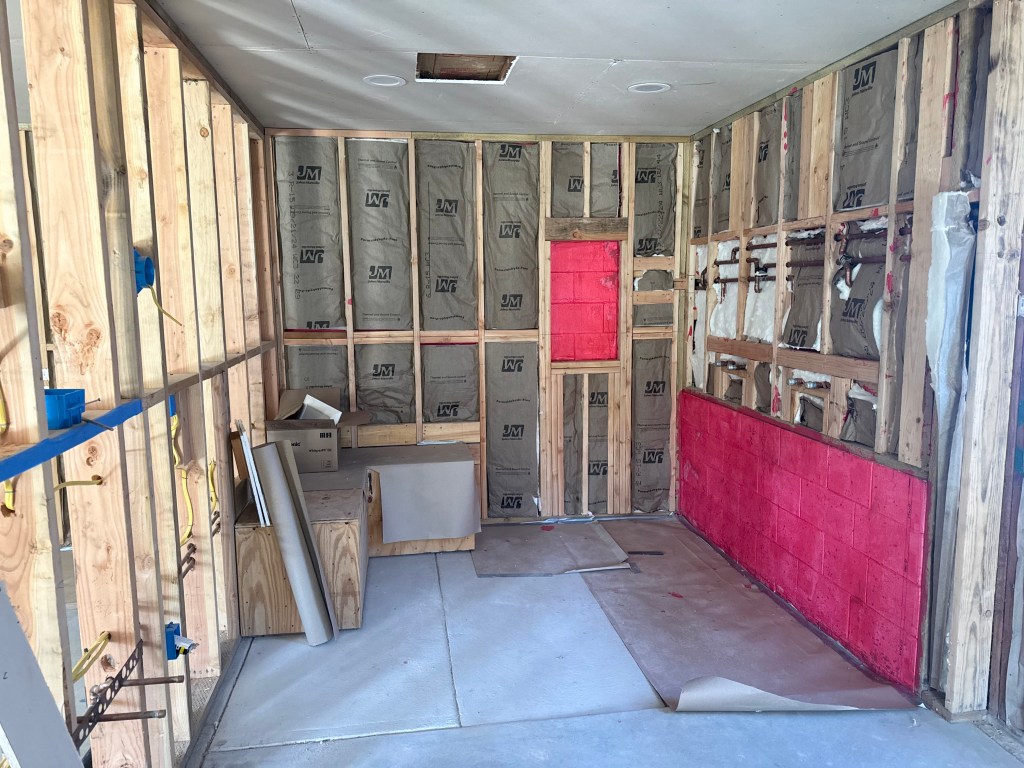
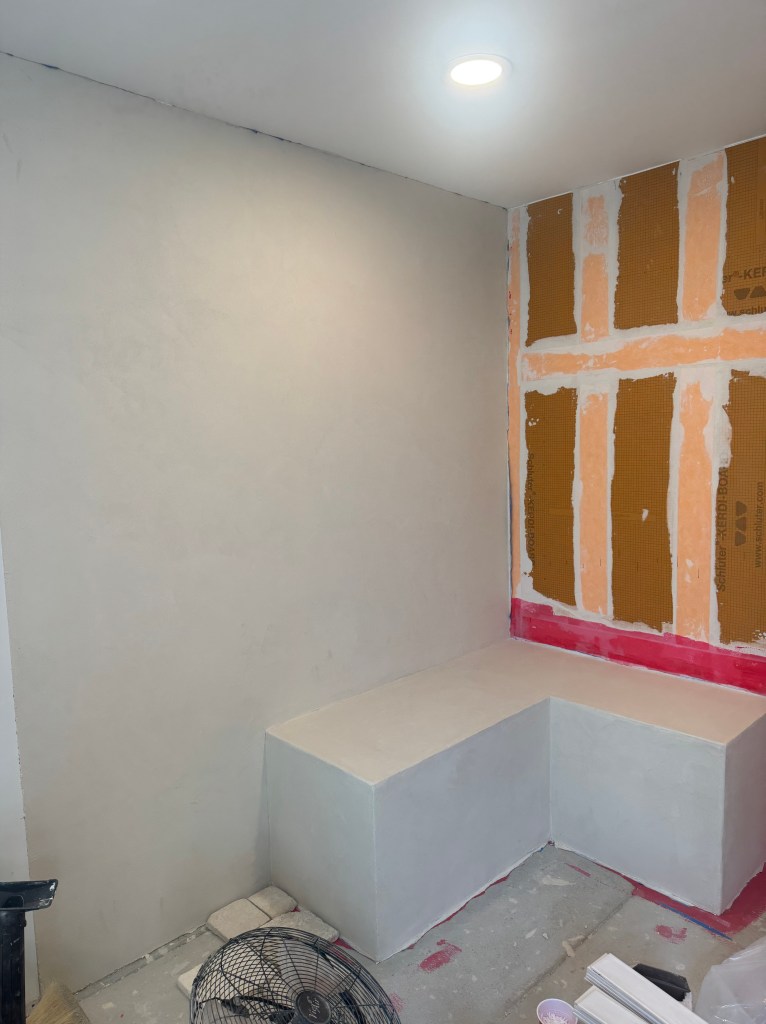
Before anything else, the shower needed to be fully prepped. I had my contractor handle the initial waterproofing using Schluter-Kerdi Board. Once that was in place, I took over to finish the final details myself—specifically, thinsetting the tape around the faucet areas.
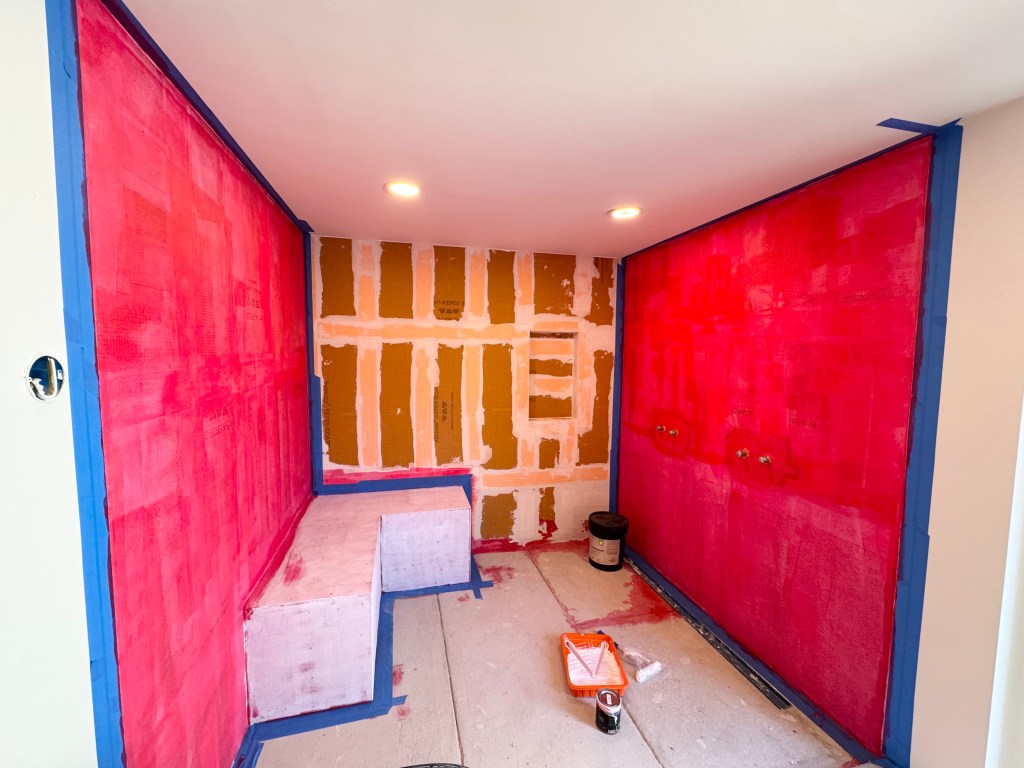
Prep work is crucial when using Meoded’s Concretta. Since this was a new construction project, the prep required a bit more time and labor than usual. After the seams were taped, thinset, and fully dried, I applied RedGard over the entire surface.
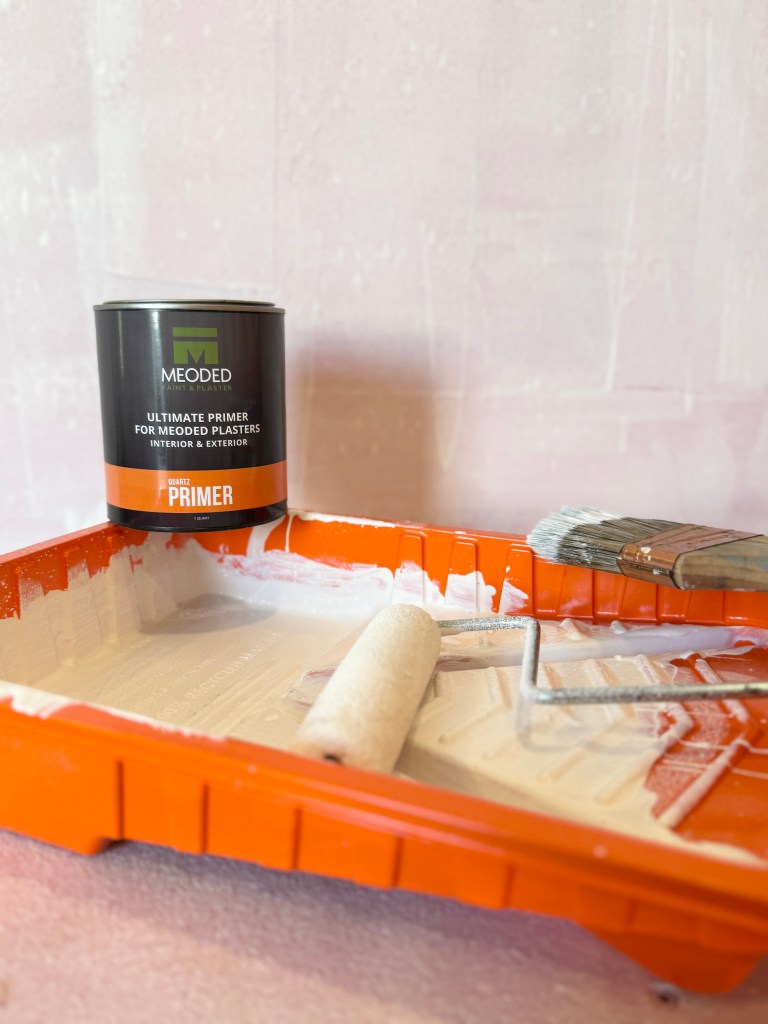
This step is absolutely essential. You want every surface to be uniform so the Concretta adheres consistently. Skipping this step could cause the seams to show through later—which no one wants after all that hard work. Once the RedGard was fully cured (I waited about 3 hours), it was time to move on to priming. For this, I used Meoded’s Quartz Primer—another key step, especially in new construction.
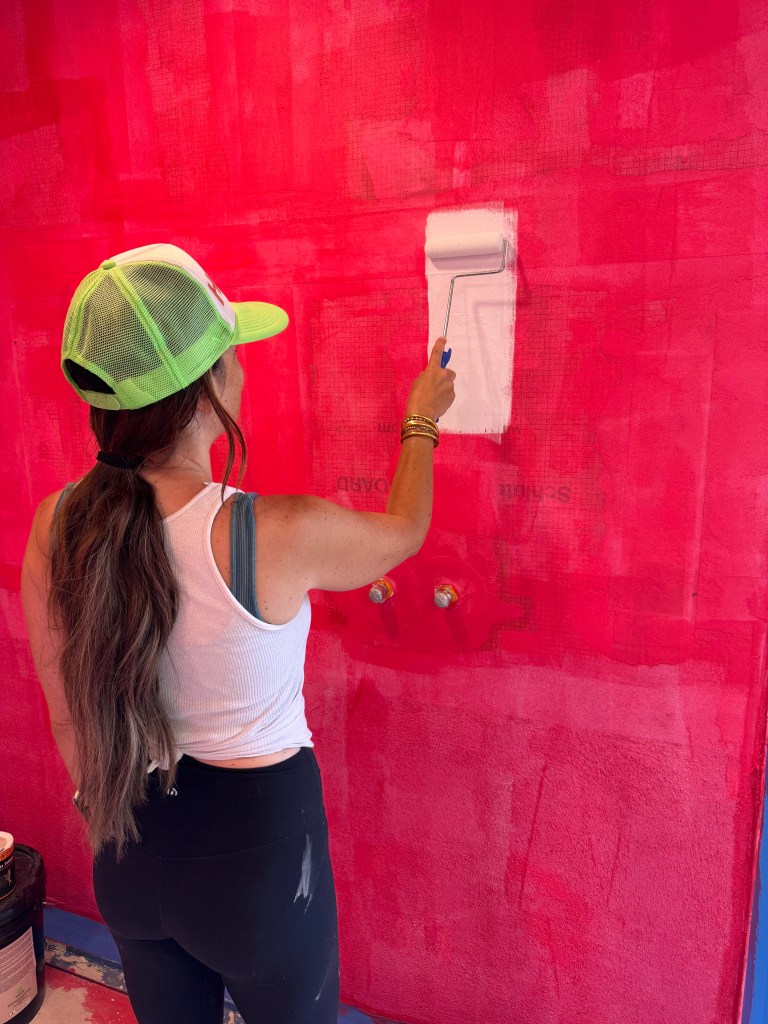
This primer not only improves adhesion, but it also makes it much easier to spread the Concretta with a trowel. I used a foam mini roller from Home Depot, which worked perfectly and made it simple to apply an even coat over the RedGard.
Then, it’s just a matter of patience—you’ll need to let the primer cure for 3 to 5 hours before moving on.

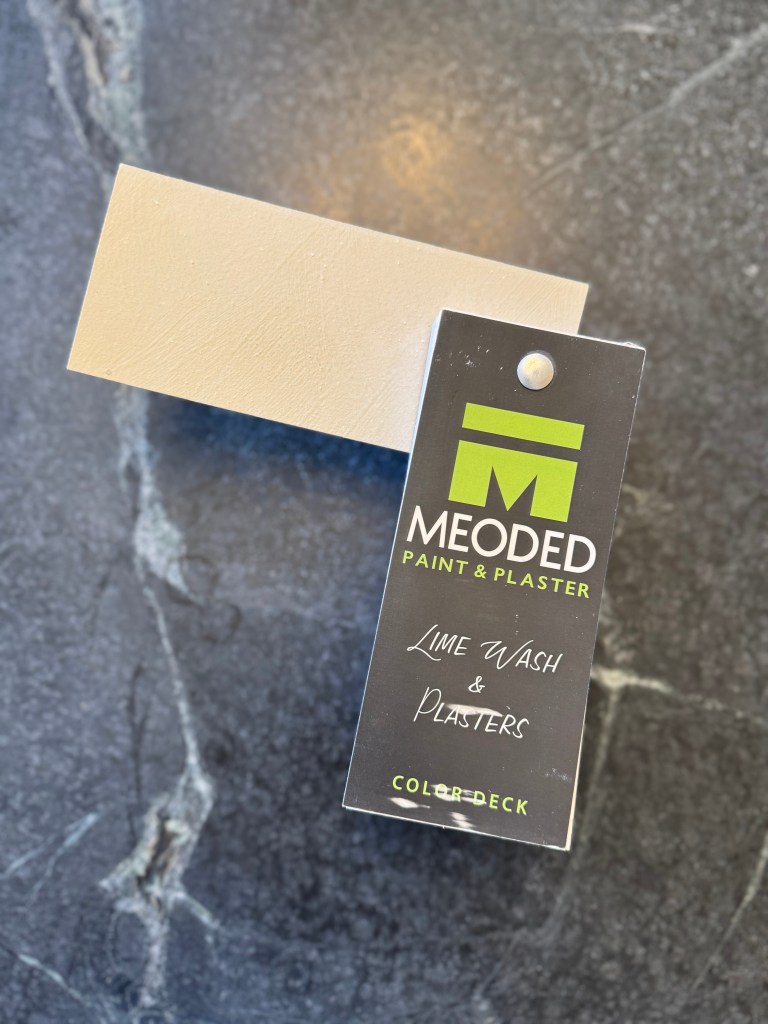
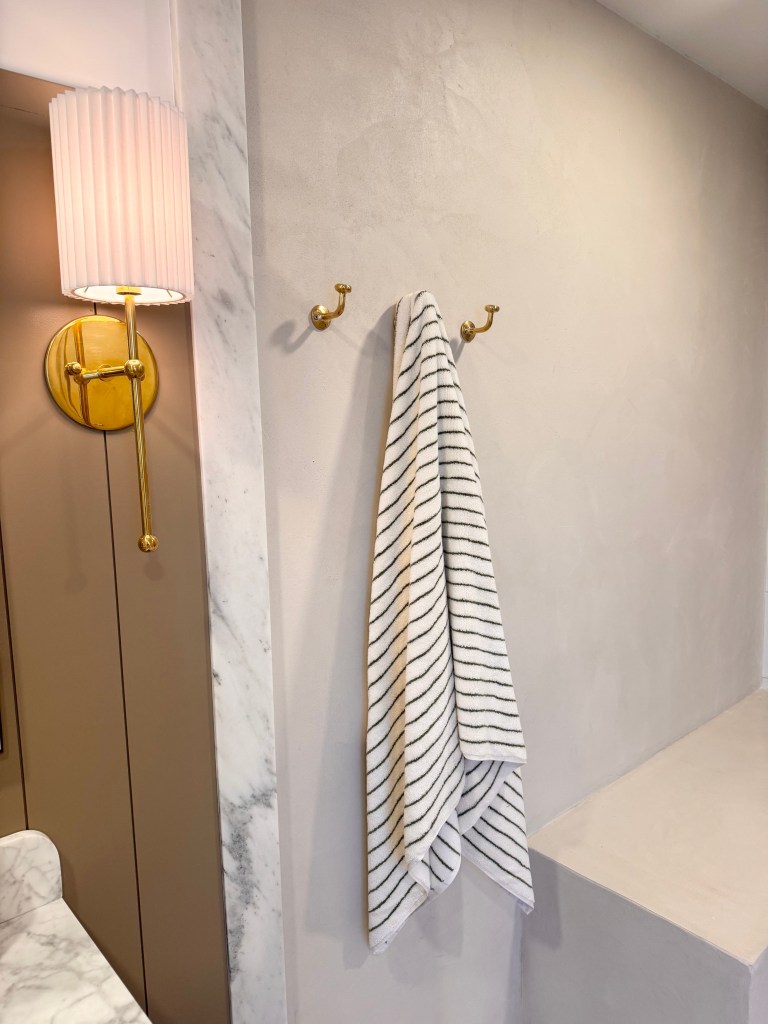
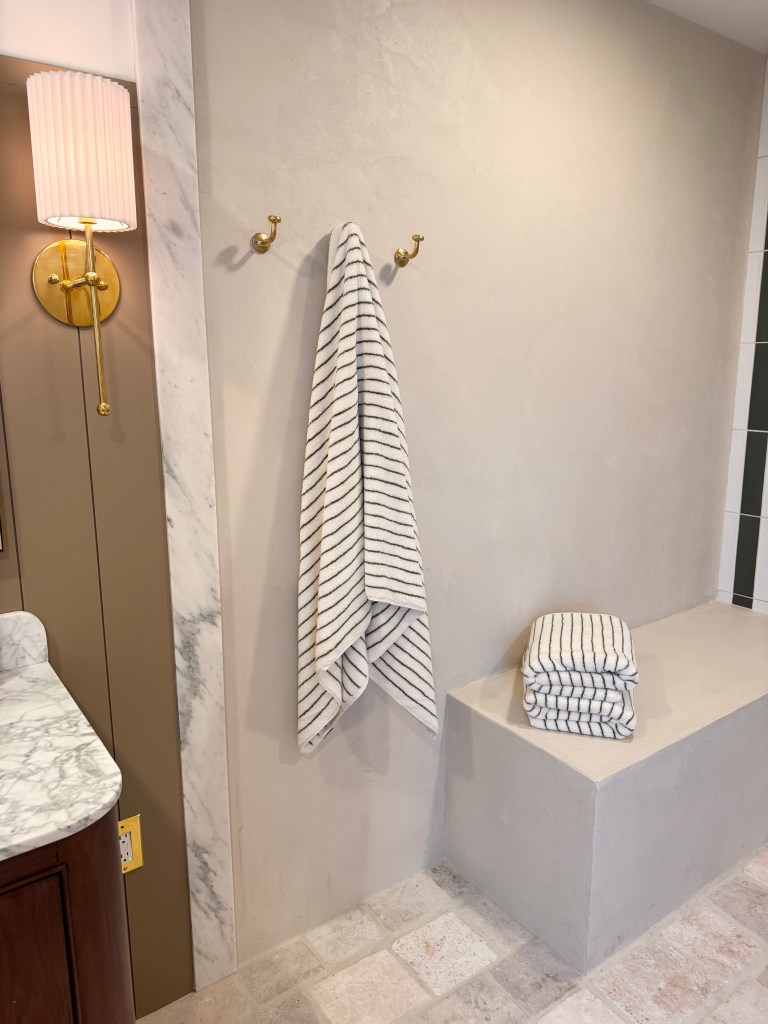
With all the prep work done, it was finally time to apply the first coat of Concretta. I chose the color Ren—a soft, subtle shade that pairs beautifully with the antique limestone floors. One of the best things about Concretta is its customization; you can tint it to any Sherwin-Williams color, which makes it easy to coordinate with the rest of your space.
For the application, I invested in the Meoded Whiteout Trowel. I’d heard great things about this tool, especially when working with light colors. It’s definitely a bit of a splurge, but worth every penny in my opinion. Without it, a standard metal trowel can leave unsightly black burnish marks—definitely not a risk I was willing to take after all that prep work!
The first coat of Concretta is meant to be thin and somewhat translucent, allowing some of the aggregate to show through. After applying it, I used a damp sponge to gently smooth and knock down any spots that looked too harsh or uneven. This step gives you a bit of control over the texture and ensures a soft, organic finish.
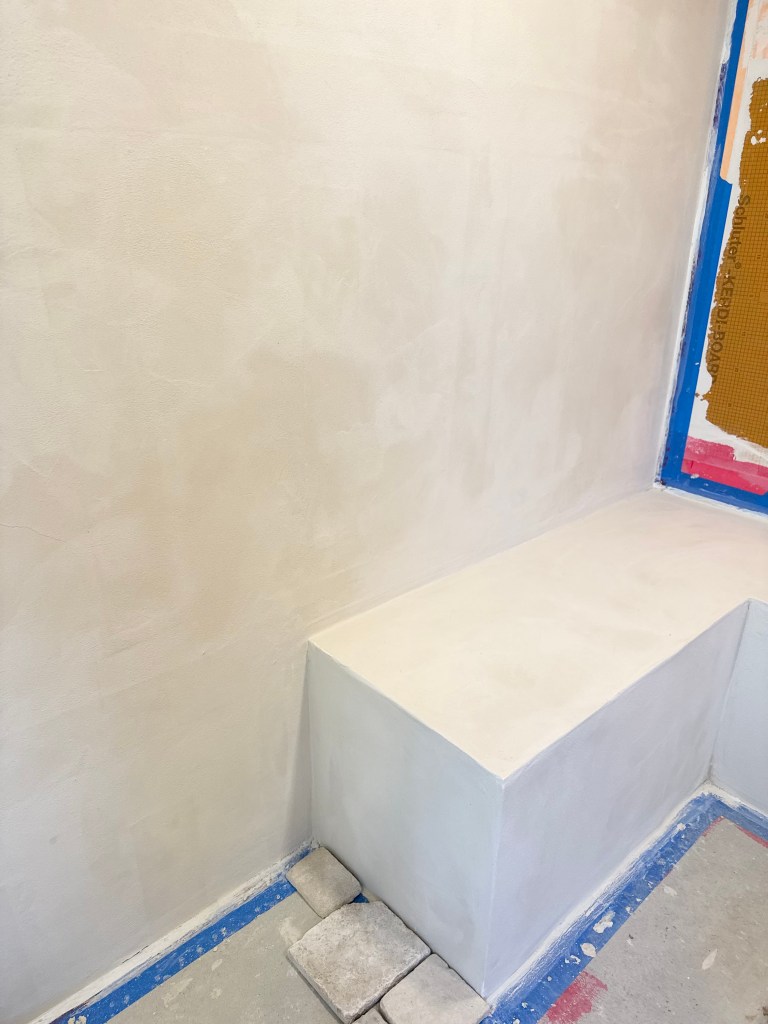
Once I finished applying the first coat, I went in with a damp sponge and worked in circular motions across the surface. Not only did this technique make me feel like a total pro, but it also served a real purpose—it intentionally roughens up the surface.
This step is meant only for the first coat. The goal here is to expose the aggregate slightly, which creates the perfect base for the second, thicker coat to adhere properly. Skipping this step could affect how well the next layer bonds, so don’t overlook it!
For the second coat, I applied it a bit thicker and used more pressure to help smooth everything out. I’ll be honest—there was a moment of panic when I wasn’t sure I’d be able to get the finish as smooth as I wanted. But thankfully, the product was incredibly easy to work with. The biggest tip? Always work with a wet edge—that makes all the difference. There are a few little imperfections here and there, but I think they add character. In the end, I truly love how it turned out!s it character and I love the way it turned out!
I waited a full week before sealing to make sure everything was thoroughly dry. It’s really important not to seal before at least 72 hours have passed—this gives the lime time to cure and the pH level to drop. If you seal too early, you’ll likely end up with a chalky finish on top, and trust me, you won’t be happy with the result.
For the first coat of sealer, I used a foam roller and diluted the sealer by about 20%. This helps it soak in and bond well with the surface. For coats two through four, I’ll apply it full strength to build up protection and get that beautiful finish.
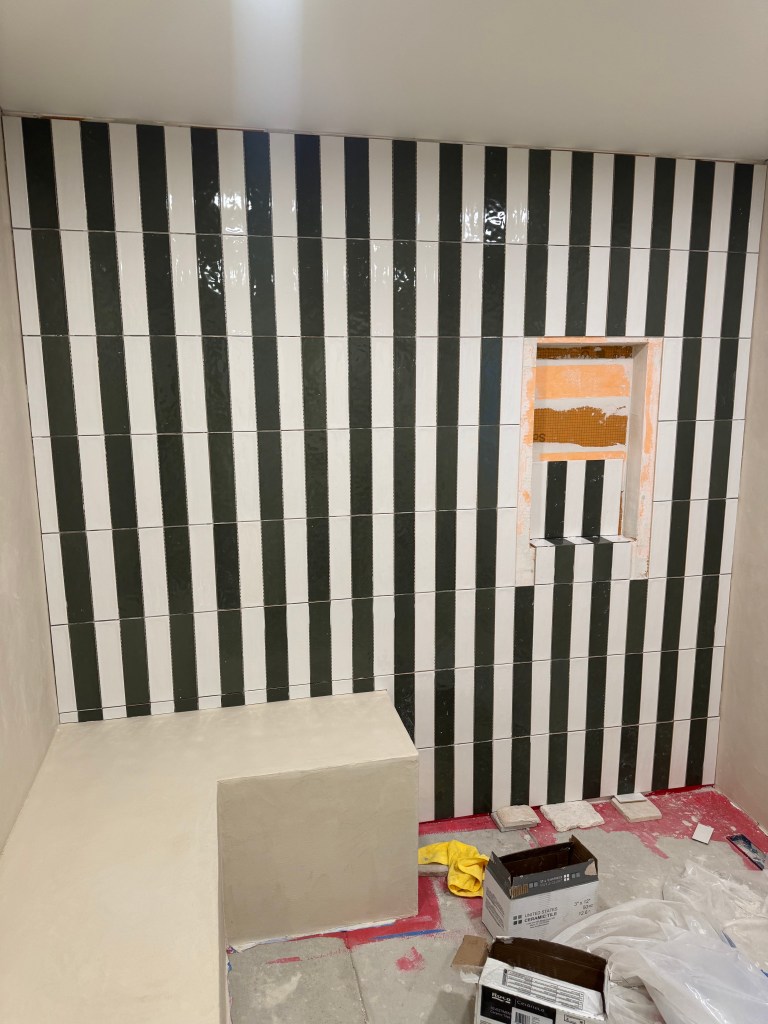
Cabana Stripes & Slim Aarons Dreams: Creating a Bold Feature Wall
When it came time to design the back feature wall in our pool house (aka the kids’ hangout zone), I knew I wanted to have a little fun. This space is meant to feel relaxed and playful—a spot where the kids can unwind with friends—so it called for something bold and full of personality. I landed on a classic green and white cabana stripe, and it was exactly the vibe I had in mind.
Inspired by the vintage charm of Slim Aarons’ iconic poolside scenes, I wanted something that felt effortlessly chic yet timeless. The cabana stripe checked all the boxes: bold, clean, and totally nostalgic.
It took a little planning and a lot of double-checking, but the payoff was worth it. The end result is a fresh, summery backdrop that sets the tone for the whole space.

To get it just right, I started by marking a perfect 90-degree angle and then carefully calculated the tile spacing to ensure the stripes would run evenly from edge to edge. Doing the stripes was surprisingly easy thanks to my Stabila laser level—I kept it on the entire time, which gave me confidence everything was perfectly straight. Once I saw it come together, I was completely in love. The green color is absolute perfection.
I also took on a little challenge by 45ing the niche for a cleaner, more professional look. It was my first time attempting it, and while it definitely took a few tries (and yes, I sacrificed a couple of tiles in the process), it was totally worth it. It’s all part of the fun, right?
For grout, I used the same color I chose for my floors—Antique White by Prism (from Home Depot)—to subtly tie everything together. That soft off-white tone blends beautifully with both the white tile and the overall palette of the space, giving it a polished, cohesive finish.
I’m completely obsessed with how it turned out. This little wall packs such a punch and I can’t wait to finish out the flooring, it might be one of my favorite details of the entire project.

What This Bathroom Project Taught Me
Finishing this bathroom project has been incredibly rewarding, and I couldn’t be more proud of the work I accomplished. From start to finish, this project challenged me in new ways and pushed me to learn skills I never expected to gain. Along the way, I picked up invaluable tools and techniques that I know will help me tackle future projects around my home with confidence.
What surprised me most was how much I genuinely loved the process. There were moments of problem-solving, patience, and persistence, but each step made the final result that much more meaningful. This bathroom isn’t just a finished space—it’s proof of how much I’ve learned and grown through hands-on experience.
Completing this project has sparked a new excitement for home improvement, and I already can’t wait to start the next one. If this bathroom is any indication, there are many more projects ahead—and I’m ready for them.

Leave a comment