

Let me start by saying—I never thought my husband would agree to these floors. Honestly, I didn’t think there was even a chance. These were my DREAM floors, and I assumed they were completely out of reach.
It all started, of course, on Pinterest. I stumbled across a photo of these stunning antique floors, and I couldn’t get them out of my head. The product? Cobblestone de Franc by François & Co.—a floor so exclusive, the website didn’t even list a price. It simply said, “Call for pricing,” which basically translates to “not happening” in my world.
But that didn’t stop me. I spent six months—yes, six—searching high and low for something that would replicate the same look and feel. Every option fell short. It was beyond frustrating.
Then, out of the blue, my husband said he’d make the call—just to “see what he could do.” The next thing I knew, he completely surprised me by ordering the real deal—one-of-a-kind, antique French limestone floors from François & Co. The rest, as they say, is history.
Laying the floors- My first time ever
Here’s the craziest part: I had never laid a floor in my life. This was my very first time. But I’ve been around construction plenty, and honestly, it didn’t seem that hard—especially with a brand-new slab to work with in the pool house.
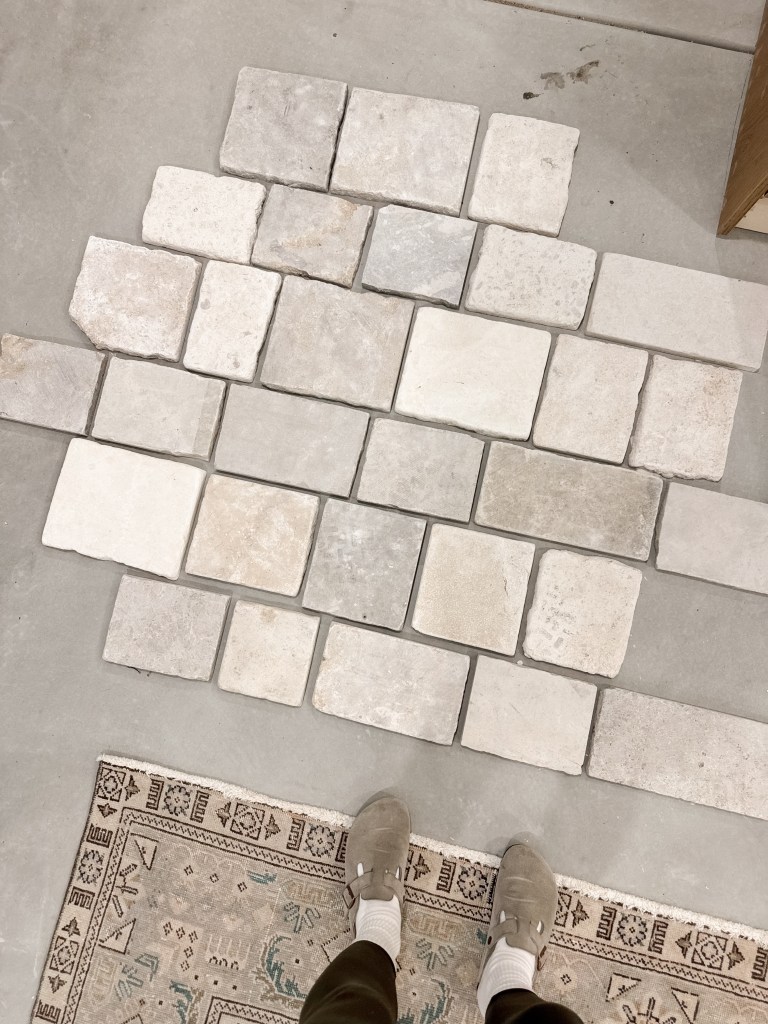
When the floors were delivered, I was even more in love than I had expected. They were perfect.
Armed with a laser level (a gift from my husband), I marked a perfect 90-degree angle—and I was off. Honestly, starting was the hardest part. But with the help of our Stabila level, I got that first row down, front to back, following the line exactly. From there, everything clicked into place.
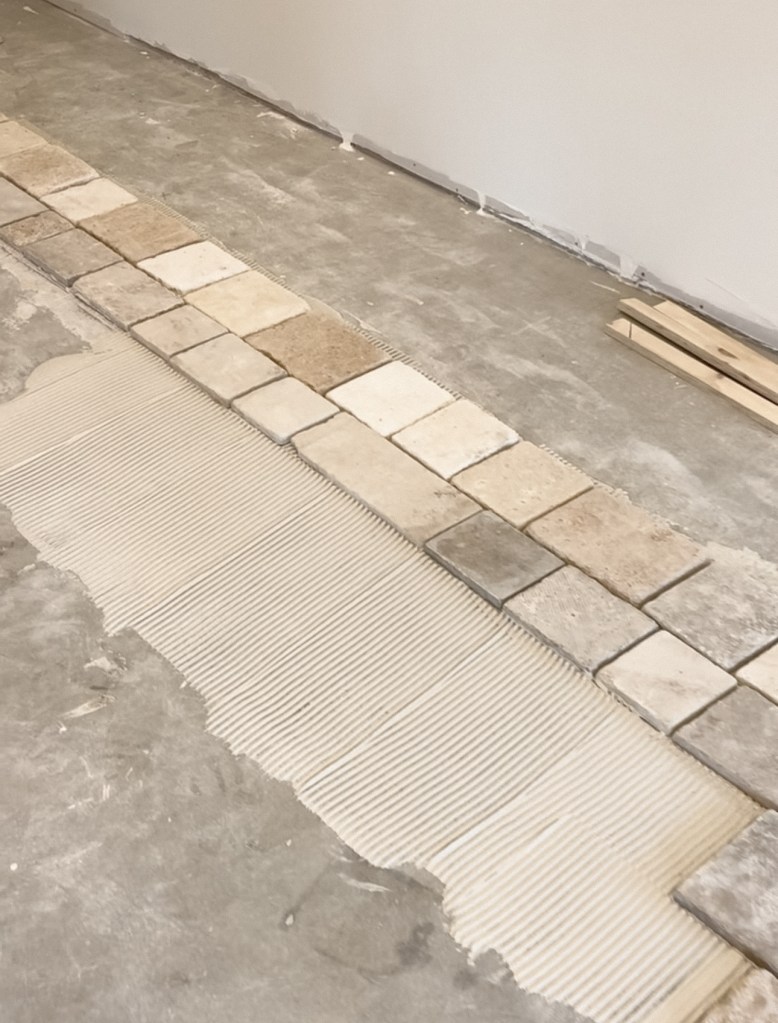
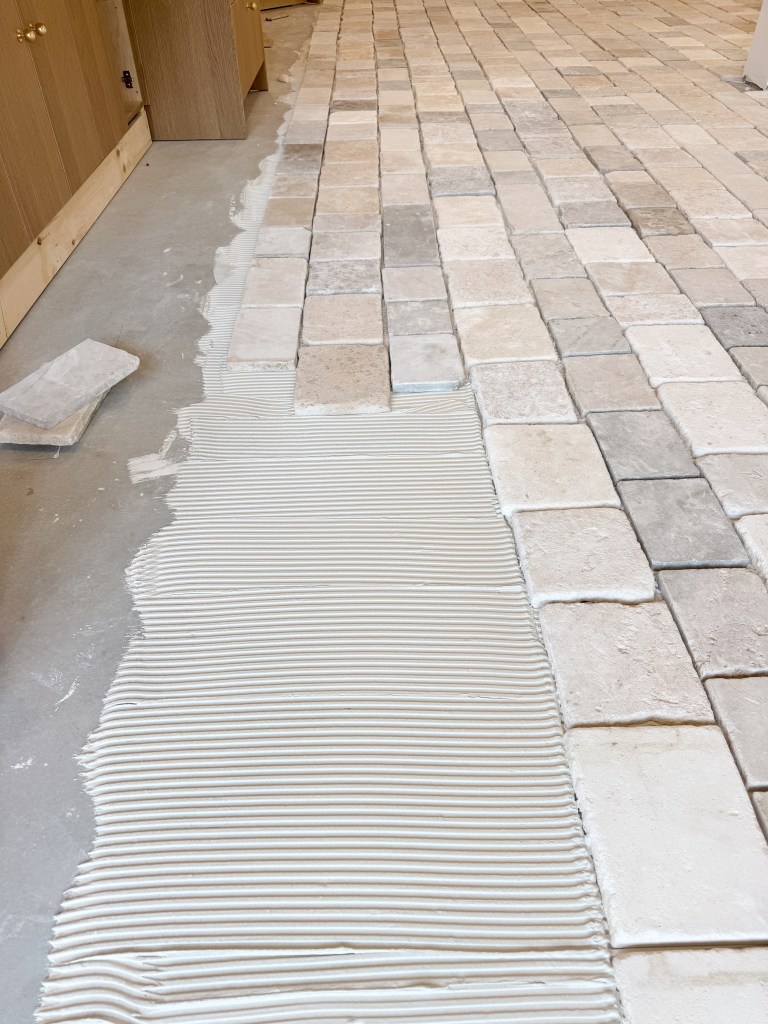
For the installation, I used a heavy tile mortar from Home Depot—nothing fancy, just something durable and strong enough to hold these hefty stones in place.
I approached the layout with a really organic mindset. I didn’t want the floors to look perfect or overly polished. My goal was for it to feel like you were strolling down a street in France in 1824—worn, charming, and full of character.
I didn’t obsess over making every tile perfectly level. I simply applied a normal amount of thinset and kept working, letting the stones guide the process. It wasn’t about precision—it was about feeling.
In total, it took me three full days to lay all 960 square feet of flooring. And honestly? Every minute was worth it.
Grouting: The Hardest Part (Seriously!)
Once I finished laying the floors, I thought it would be smooth sailing from there. Wow… was I wrong.
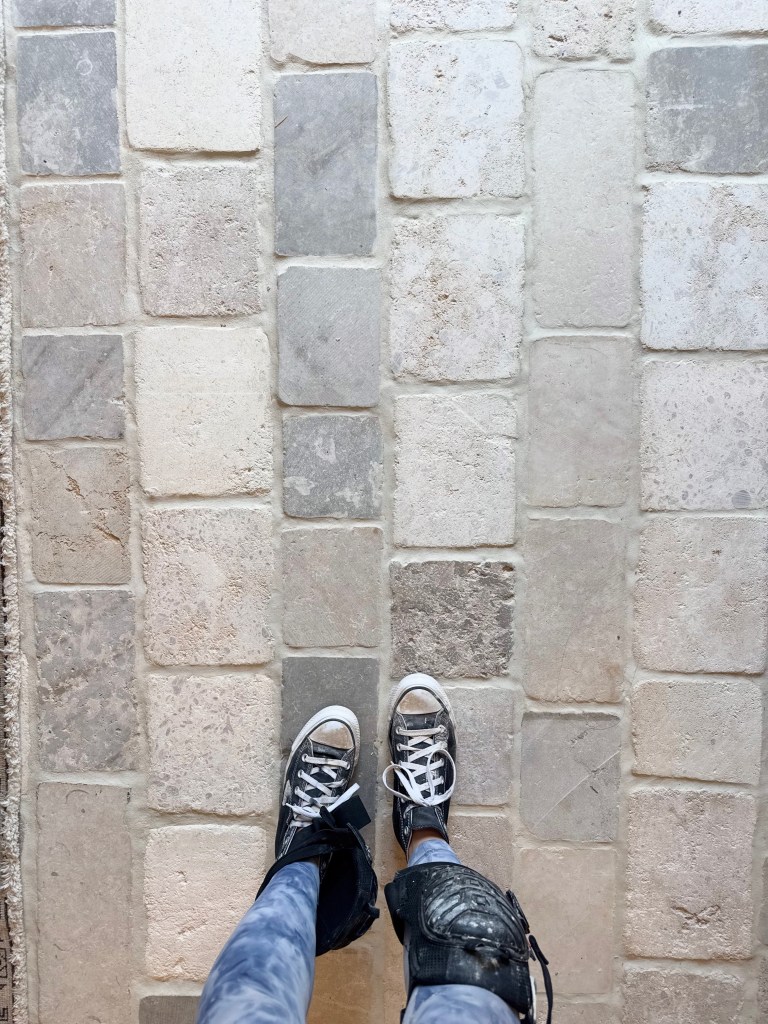
Grouting turned out to be one of the hardest, most exhausting tasks I’ve ever taken on. It took me seven full days to grout these floors—and when I say I worked from sun up to sun down, I mean it. Every. Single. Day.
I quickly realized I needed the right tools to survive this part of the project, so I invested in some grout bags—and honestly, they were a lifesaver. With some of my grout joints being pretty large, piping in the grout felt a lot like icing a giant cake. Luckily, I was actually pretty good at it… but wow, my hands were aching by the end of it!
Honestly, it turned out even better than I expected, and I’m so proud I decided to take this on myself. It was definitely hard on my body, but absolutely worth it—especially considering I was quoted $13,000 to have them professionally installed. These are still the floors of my dreams, and I couldn’t be happier that I get to see them every single day.

Leave a comment